
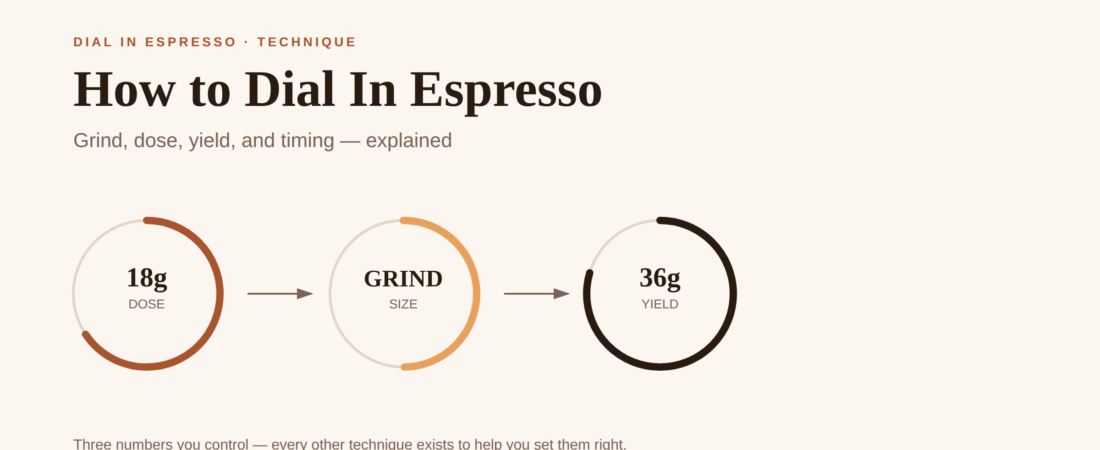
“Dialing in” gets thrown around like it’s obvious, but nobody explains what you’re actually adjusting before they say it. You’ll hear “just dial it in” the way you’d hear “just season it to taste” â technically true, useless if you don’t know what the variables are or how they interact. Dialing in an espresso shot comes down to three numbers you control directly: how much ground coffee goes into the portafilter, how much liquid espresso comes out, and how finely that coffee is ground. Everything else â tamping, timing, taste â exists to help you read and adjust those three numbers correctly.
This guide walks through dialing in from the ground up: what the variables actually are, the ratio and timing targets to start from, how tamping and distribution affect the shot before it even starts, and how to read a bad-tasting shot back to the variable that caused it. By the end, a stalled or inconsistent shot should be a diagnosable problem, not a mystery you throw more coffee at.
If you’re searching for how to dial in espresso for the first time, here’s the short version: nail the ratio, use the extraction window as a check rather than a target, and let taste tell you which way to move the grind. That’s dialing in espresso in practice, not theory.
What Dialing In Actually Means
Every espresso shot is defined by three numbers: dose (how many grams of ground coffee you put in the portafilter), yield (how many grams of liquid espresso come out), and grind size (how fine or coarse the coffee is ground). Dialing in means adjusting those three until the shot extracts in the right time, at the right ratio, and tastes balanced. That’s the whole definition. There’s no fourth secret variable â every other technique on this page (tamping, distribution, timing) is either a way of controlling those three more precisely or a way of reading whether they’re set correctly.
The three variables aren’t independent, either â they push on each other. Grind finer without changing anything else, and water moves through the puck more slowly, increasing extraction time and usually increasing yield if you let it run. Increase your dose without changing the grind, and you’ve packed more resistance into the same basket, which also slows the shot down. This is why dialing in is a loop, not a one-time setting: you change one variable, taste the result, and adjust based on what you tasted â usually the grind first, since it’s the variable with the most leverage over extraction.
Brew Ratio: Your Starting Point
The brew ratio is the relationship between dose and yield, written as dose: yield. A 1:2 ratio â 18 grams of ground coffee in, 36 grams of espresso out â is the standard starting point for most modern espresso, and it’s a reasonable default precisely because it’s not extreme in either direction. It gives you enough liquid to extract a full range of flavor without diluting the shot into bitterness or choking it into a syrupy, under-extracted sip.
18g in, 36g out is a starting point, not a rule. A ristretto shot (roughly 1:1.5, or 18g in for 27g out) concentrates the shot â more body, more intensity, less room for bitterness to develop, which is why it’s often used with darker roasts that turn bitter fast.
A lungo (1:2.5 to 1:3) pulls more liquid through the same dose, which extracts more from the grounds and can pull out flavors a shorter shot misses â but it also risks over-extraction and a thinner body if pushed too far. If a shot tastes weak or watery, shorten the ratio (less yield for the same dose) before changing anything else. If it tastes muddy or overwhelming, lengthening the ratio is often a faster fix than changing the grind.
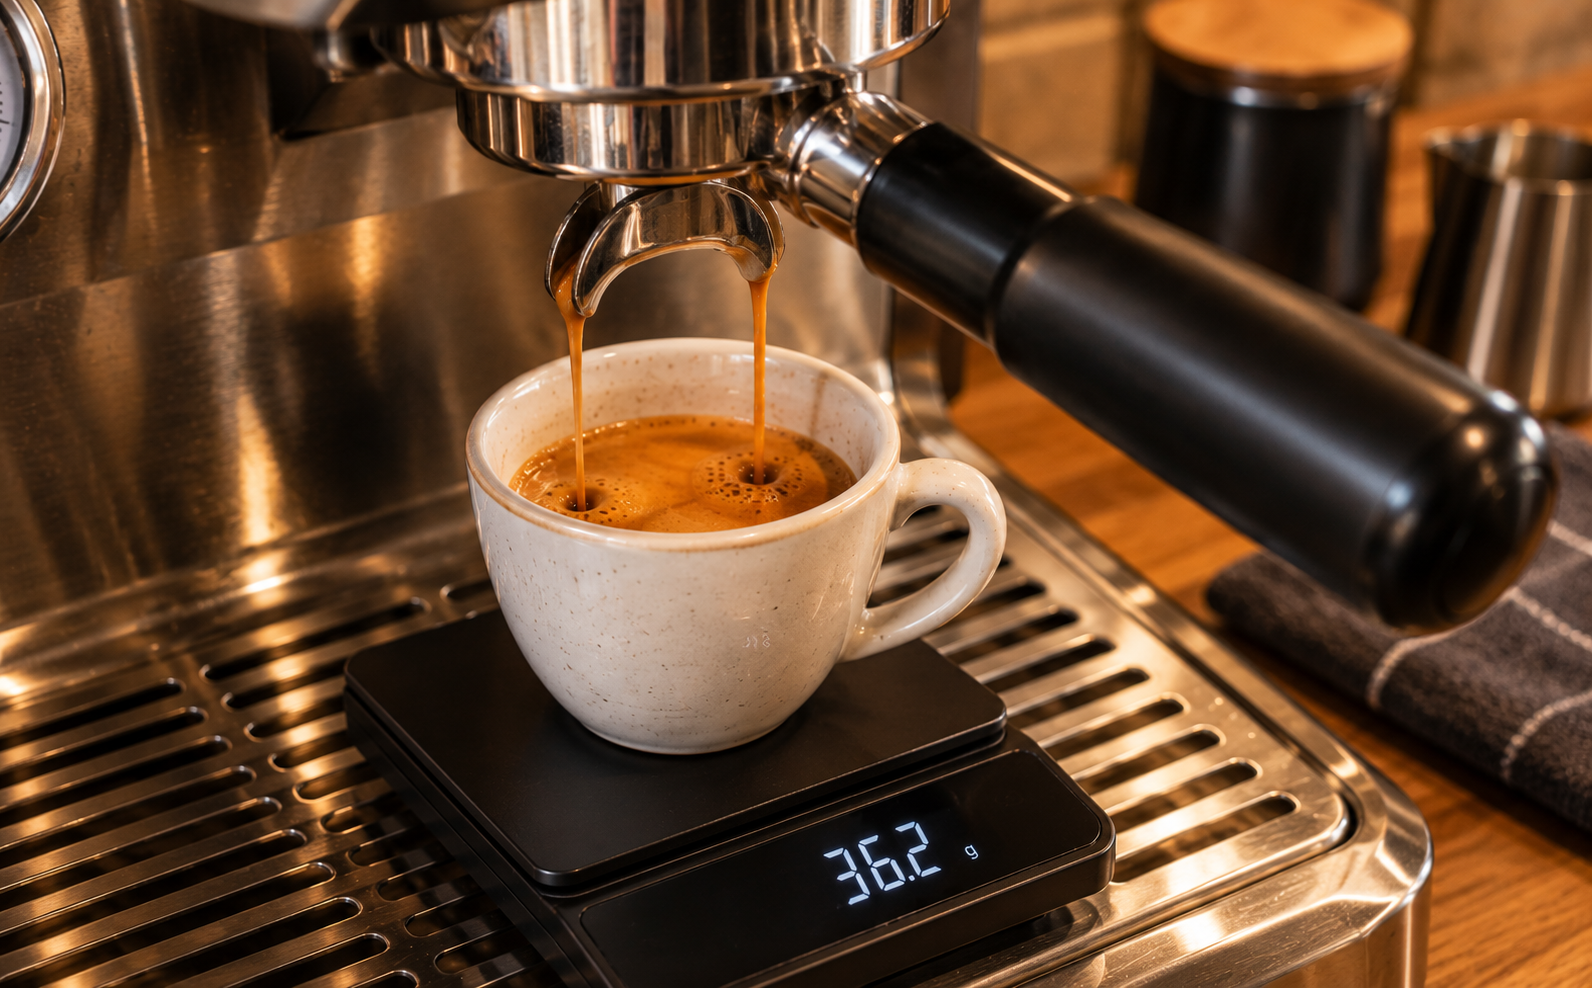
Weigh both sides of the ratio. A shot glass or cup gives you volume, not weight, and espresso’s crema means volume is a genuinely unreliable stand-in for how much liquid you actually pulled. A basic gram scale under the portafilter is the cheapest upgrade for shot consistency.
Extraction Time: The Check, Not the Target
Most shots aim for a 25â30 second extraction window, timed from when the pump starts (or the lever drops) to when you cut the shot at your target yield. That window matters less as an end in itself and more as a diagnostic: it’s the range where, for most beans and most machines, dose, yield, and grind tend to land in balance together. A shot that blows through in 15 seconds is almost always ground too coarse â water found too little resistance and moved through too fast, under-extracting the coffee and leaving it sour or thin. A shot that crawls past 40 seconds is usually ground too fine, over-extracting and pulling out bitter, harsh compounds along with the flavor you wanted.
This is the part of learning how to dial in espresso that trips people up most: time is a symptom, not a control. You can’t “set” extraction time directly â you set the grind, and time is what happens as a result. If a 20-second shot tastes genuinely balanced, that’s more useful information than a 28-second shot that tastes sour. The window is a fast way to catch a shot that’s obviously off before you even taste it, not a number to chase for its own sake once the coffee in the cup tells you otherwise.
Tamping and Distribution: Setting Up an Even Extraction
Grind, dose, and ratio control how much resistance water meets on average. Tamping and distribution control whether that resistance is even across the puck â and uneven resistance is one of the most common causes of a shot that tastes inconsistent from one pull to the next, even with the same beans and the same grind setting.
If coffee grounds sit unevenly in the basket before tamping â more piled on one side, clumps of varying density â a level, firm tamp doesn’t fix that; it just presses an uneven bed into a level surface with uneven density underneath. Water always finds the path of least resistance, so it channels through the loosely packed areas fast and barely touches the dense areas at all. That’s channeling, and it produces a shot that’s simultaneously under-extracted (the fast channels) and over-extracted (whatever water does eventually push through the dense spots) â which usually just tastes bad in a way that’s hard to pin down.
This is why WDT (Weiss Distribution Technique) has become close to standard practice: before tamping, a thin tool â a needle, a WDT distributor, even a paperclip â is stirred through the grounds to break up clumps and level the bed. Only after that does the tamp itself matter, and at that point tamping is simpler than most guides make it sound: press level, press firm and consistent, and stop worrying about exact pressure in pounds. A firm, level tamp on a well-distributed bed matters more than hitting a specific number on a tamp scale.
The Espresso Taste Map: Reading a Shot Back to Its Cause
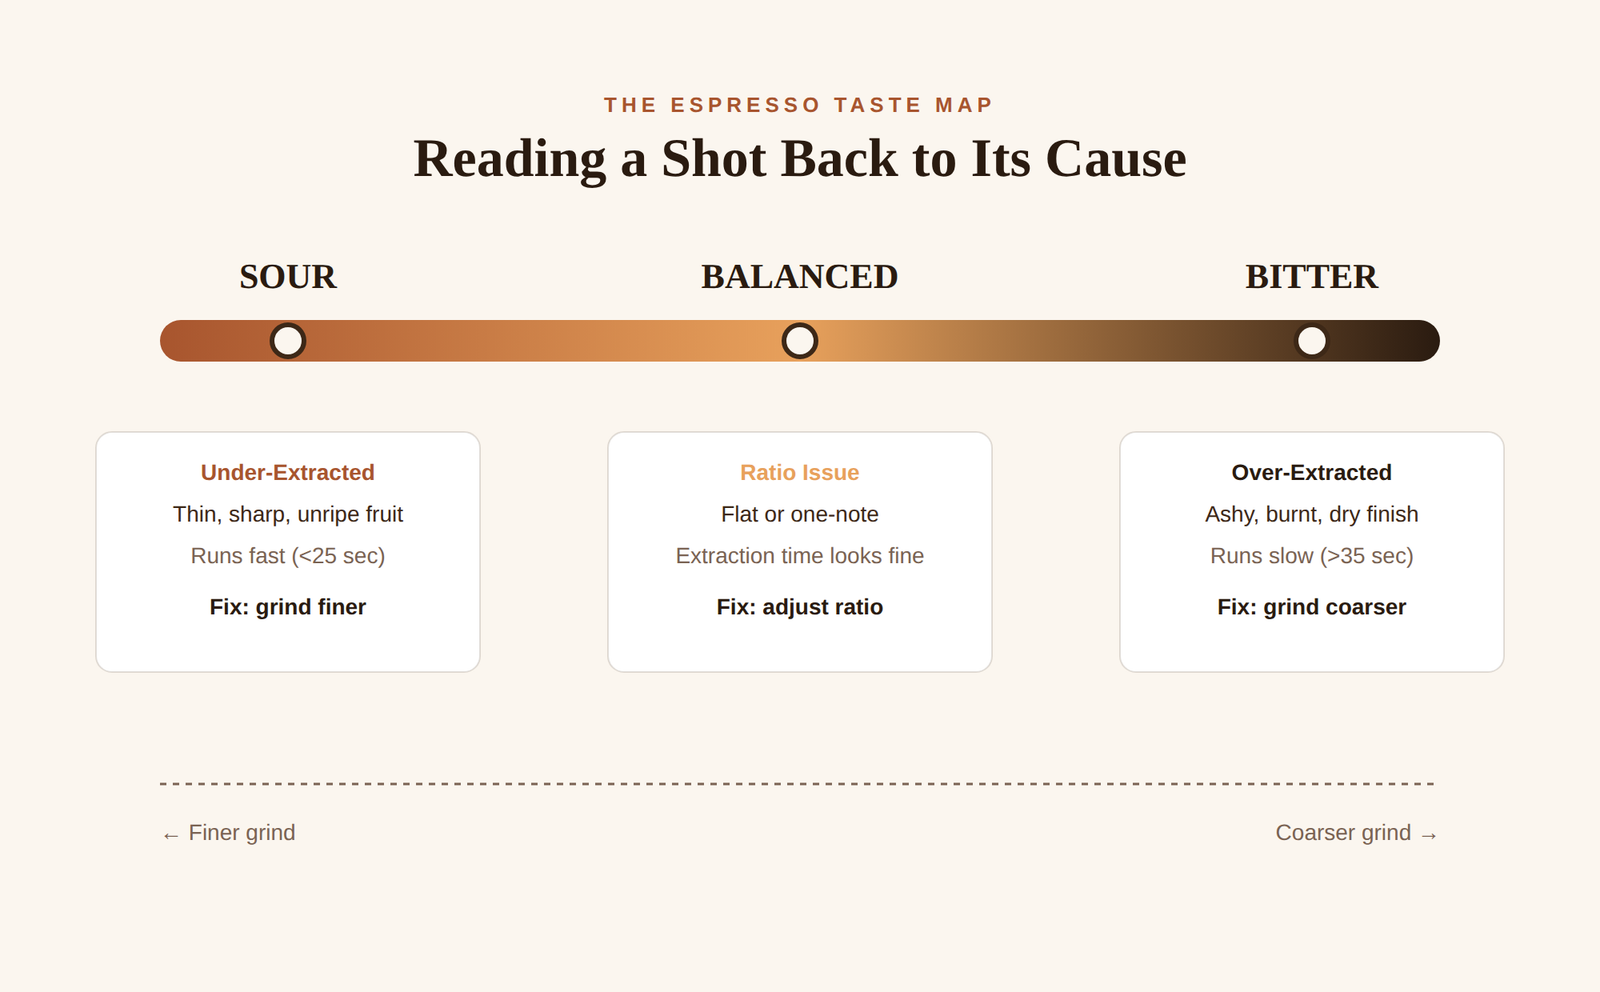
Once dose, ratio, and distribution are under control, taste is what tells you where the grind actually needs to go â and most espresso problems fall into one of three buckets.
Sour or sharp: the shot tastes thin, acidic, or like unripe fruit, with little sweetness underneath. This is under-extraction â water moved through the coffee too fast to dissolve enough of it. Grind finer, and if the shot is also running fast (under ~25 seconds), that confirms it.
Bitter or harsh: the shot tastes ashy, burnt, or dry on the finish, with sweetness getting crowded out by a lingering harshness. This is over-extraction â water spent too long pulling compounds out of the coffee, including the ones that only show up late in the extraction and taste bad. Grind coarser, especially if the shot is also running slow (over ~35 seconds).
Balanced but flat or one-note: not sour, not bitter, but not particularly interesting either â this is usually a ratio problem rather than an extraction problem. A shorter ratio (less yield) concentrates flavor and body; a longer ratio (more yield) can bring out notes a short shot misses. Adjust the ratio before touching the grind if the extraction itself already seems in the right range.
Change one variable at a time. Adjusting grind and dose and ratio all at once might land on a good shot by luck, but it won’t teach you anything you can repeat â and repeatability, not any single perfect shot, is the actual goal of dialing in.
How to Dial In Espresso: Putting It Together
A practical dialing-in session looks like this: start at an 18g dose and a 1:2 ratio (36g out), aim for the 25â30 second window as a rough check, and taste. If it’s sour and fast, grind finer. If it’s bitter and slow, grind coarser. If the timing looks right but the taste is flat, adjust the ratio before the grind. Distribute with WDT and tamp level and firm every time, so the variable you’re testing is actually the one you changed â not an inconsistent puck adding noise to the result. Repeat, changing one thing at a time, until the shot tastes balanced and you can pull it again the next day and get the same result.
Common Mistakes When Dialing In
When people learn how to dial in espresso, changing more than one variable at once is the biggest mistake â it can produce a good shot, but tells you nothing about why. Chasing the 25â30 second window as a target instead of a check is another: a shot that hits the time window but tastes sour or bitter is still wrong, and the fix is still the grind, not the clock. Skipping distribution and blaming the grinder is a third â a channeling shot can taste sour and bitter at the same time, which looks like a contradiction but is actually just uneven extraction, and no amount of grind adjustment fixes an unevenly distributed puck.
What to Check Out Next
If a shot is fast, hollow, and never quite pulls it together no matter how fine the grind goes, that’s often a tamping or distribution issue rather than a grind issue â worth ruling out before assuming the grinder is the problem. For the fundamentals behind why grind size matters as much as it does, What Is Espresso? covers the mechanics of pressure extraction that make it all work the way it does.
The Final Take
Learning how to dial in espresso is less about talent and more about reading feedback correctly. Dialing in isn’t a skill you either have or don’t â it’s a loop: set dose and ratio, distribute and tamp evenly so the puck isn’t lying to you, taste, and adjust the grind based on what the taste is actually telling you. Sour means finer. Bitter means coarser. Flat means the ratio, not the grind. Do that consistently, one variable at a time, and “dialing in” stops being a phrase baristas throw around and becomes a checklist that takes a shot from bad to repeatable.
For the pressure and temperature mechanics behind why each of these variables moves the shot the way it does, Wikipedia’s overview of espresso covers the extraction process in more technical detail.