
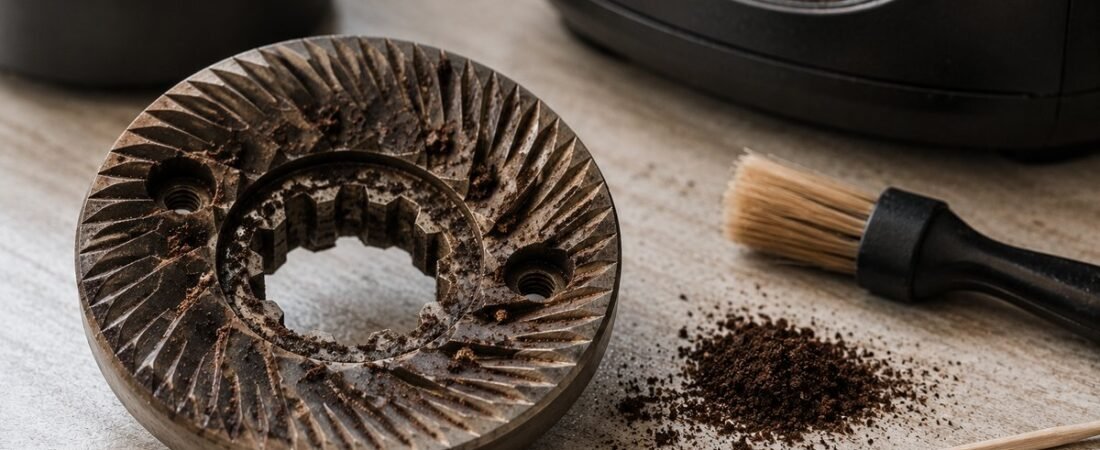
Every other routine in this hub has an obvious trigger. The machine looks used, or a shot tastes off, or it’s just Sunday and it’s backflushing day. Grinder maintenance doesn’t get that same nudge. A grinder can run for months looking and sounding completely normal while old grounds quietly build up inside the burr chamber, and because the symptoms show up as inconsistency rather than a clear failure, it’s easy to blame technique or beans instead of the one part of the setup that’s actually overdue for attention.
This is really two separate habits stacked together: understanding and managing grind retention, which affects every single shot, and periodically cleaning the burrs themselves, which affects flavor and grind consistency over the longer term. Both get skipped for the same reason. Nothing about a grinder announces that it needs either one.
Understanding Grind Retention
Retention is coffee that gets trapped inside the grinder, in the burr chamber, the chute, behind the burr carrier, instead of falling straight through into your portafilter. Every grinder retains some amount; it’s a question of how much, not whether. Low-retention designs hold under a gram or two, while some larger-chambered grinders can retain 6 to 12 grams or more.
The problem isn’t the retained coffee sitting there. It’s what happens when it comes back out. Old, stale grounds left behind from your last grind eventually get pushed out by the next dose, mixing old and new particles in the same shot. Stale grounds behave differently in extraction than fresh ones: they tend to produce a noticeably faster, thinner, more watery shot, sometimes called a “gusher”, because degraded particle structure changes how water moves through the puck. This is also why a grind adjustment doesn’t always take effect immediately: leftover particles from your old setting can still be working their way out of the chamber into your next dose or two, muddying your read on whether the adjustment actually worked.
Reducing Retention Day to Day
You can’t eliminate retention entirely without replacing the grinder, but you can manage it. The simplest and most widely used method is purging: grinding for a second or two and discarding that output before grinding your actual dose, especially first thing in the morning or after the grinder’s sat idle for a while. How much purging helps depends on your specific grinder’s retention. A low-retention model needs barely anything, while a higher-retention one benefits from a more deliberate purge.
If you notice your shots are consistently a little too fast and thin right after the grinder’s been sitting, or right after you change the grind setting, that’s retention showing up in your cup, and it’s worth building a quick purge into your routine rather than troubling yourself with a “why is today’s shot different” investigation every time.
Weekly Quick Clean
This is light maintenance, not a teardown, and it takes a couple of minutes.
- Clear the chute. A quick purge or a squeeze of a small bellows blower clears out any grounds sitting in the exit path.
- Empty and wipe the hopper. Remove it, tip out any remaining beans, and wipe the interior with a dry microfiber cloth. Bean oil builds up here too, and it’s an easy thing to overlook since it’s not part of the grinding path itself.
- Brush the visible burr area. With the hopper off, a stiff-bristled brush on the exposed part of the top burr, followed by a vacuum with a crevice attachment to pull out loosened fines, catches what accumulates between deeper cleans.
Deep Clean Every 4 to 6 Weeks
A full clean goes further, reaching the burrs themselves rather than just the chute and hopper. Two approaches work, and they’re not mutually exclusive. Some people alternate between them.
Cleaning tablets (Grindz and similar products) are the lower-effort option. Run the hopper empty, pour in the recommended dose of tablets at a medium-coarse setting, and let them grind through into a container. The tablets are made of absorbent food-safe material designed to pull oils and fines out of the burr chamber as they pass through. Follow with a small batch of cheap throwaway beans ground at your normal setting to season the burrs and clear out any tablet residue before you grind coffee you’ll actually drink.
Manual disassembly goes deeper but takes more care. Unplug the grinder completely, not just powered off, before doing anything. Consult your specific model’s manual for how the top burr comes off (a twist for many conical burr setups, sometimes an Allen key for flat burrs), then use a wooden toothpick or a soft nylon brush to work compacted fines out of the grooves and edges. Never use water, steel burrs rust quickly once wet, which dulls them and can introduce a metallic taste, and never use compressed air, which just blasts fine particles further into the motor housing and electronics instead of removing them. A vacuum with a narrow attachment is the right tool for clearing loose debris from the chamber.
Reassembly and Recalibration
After a deep clean, especially a manual one, don’t assume your grind setting still means what it did before. Reinstalling the top burr means realigning threads carefully, and your grinder’s zero point, the setting where the burrs just barely touch, can shift slightly in the process. Recheck it before trusting your usual number. Your first couple of shots after a clean will likely run faster than normal too, simply because the chamber is empty of the retained grounds it had built up; that’s expected, not a sign something’s wrong, and it settles back to normal within a shot or two as the burrs re-season.
Signs You’re Overdue
Shots that taste flatter or more one-dimensional than they should, despite consistent beans and technique, often trace back to burr buildup rather than a burr wear issue. Buildup mutes flavor in a way that’s easy to mistake for stale beans. A grinder that suddenly runs louder or feels like it’s working harder than usual is picking up resistance from compacted grounds. And if your shots have felt subtly inconsistent, sometimes fast, sometimes slow, without an obvious cause, and it’s been more than six weeks since your last deep clean, that’s a reasonable first thing to rule out before chasing anything more complicated.
Common Mistakes
Assuming a quiet, working grinder doesn’t need cleaning. Retention and burr buildup don’t make noise or look obviously wrong. That’s exactly why this gets skipped.
Skipping the purge after a grind adjustment. Old particles from the previous setting can linger for a shot or two, making it look like your adjustment didn’t work when it actually just hasn’t fully taken effect yet.
Using water, rice, or compressed air to clean burrs. All three cause real damage. Rust, motor strain, or fine particles pushed deeper into places you can’t reach.
Not recalibrating the zero point after reassembly. Your old grind number may not mean the same thing anymore once the burrs go back in.
Judging flavor from the first shot after a deep clean. Give the burrs a couple of shots to re-season before deciding whether anything’s actually different.
Grinder Maintenance: Putting It Together
Retention management is a daily habit. A quick purge that costs a few seconds and keeps stale particles from working their way into fresh shots. Burr cleaning is a periodic one, every four to six weeks, that clears buildup neither backflushing nor a quick wipe-down ever touches. Neither announces itself the way a leaking group head or a scaled-up boiler does, which is exactly why this is the maintenance task most home setups quietly skip. Right up until the flavor drift becomes hard to ignore.
What to Check Out Next
If burr wear itself, not just buildup, is the question, the Is It Technique or Equipment? guide in the troubleshooting hub covers the signs that point to worn burrs specifically, including roughly how long a typical set of steel burrs lasts before replacement actually becomes the right call.
For the mechanics behind why burrs need this periodic reset in the first place, Wikipedia’s overview of burr grinders covers the wear and buildup process in more technical detail.