
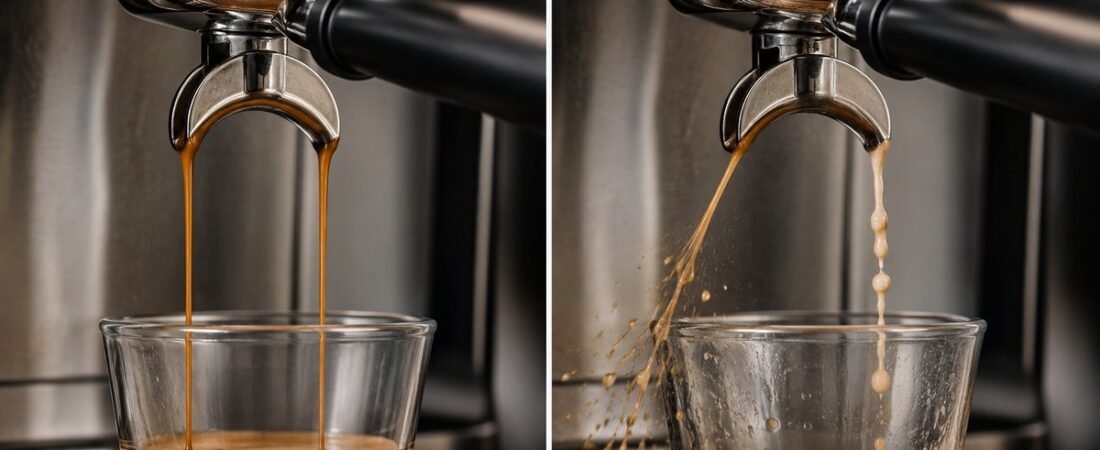
Espresso channeling is the one problem that looks dramatic and gets misdiagnosed all the time. A shot that sprays sideways out of the portafilter (the handle that holds the basket of coffee), squirts instead of flowing, or finishes in twelve seconds while tasting thin and sour usually isn't a grind problem or a bad bean. It's water finding the path of least resistance through the puck (the pressed cake of coffee grounds in the basket) instead of moving through it evenly. Once you know what to look for, channeling is one of the easiest problems on this hub to spot and one of the most satisfying to fix, because the fix rarely involves buying anything.
If you are not sure channeling is the problem, the espresso shot diagnosis tool can help. Enter how the shot tastes and how long it ran.
This guide covers what espresso channeling looks like while a shot is pulling, why uneven distribution causes it, the habits that create it without you noticing, and the fixes in the order to try them.
What Espresso Channeling Looks Like
Channeling shows up during the pour, not just in the cup, which makes it easier to catch than most extraction problems if you're watching the shot as it pulls.
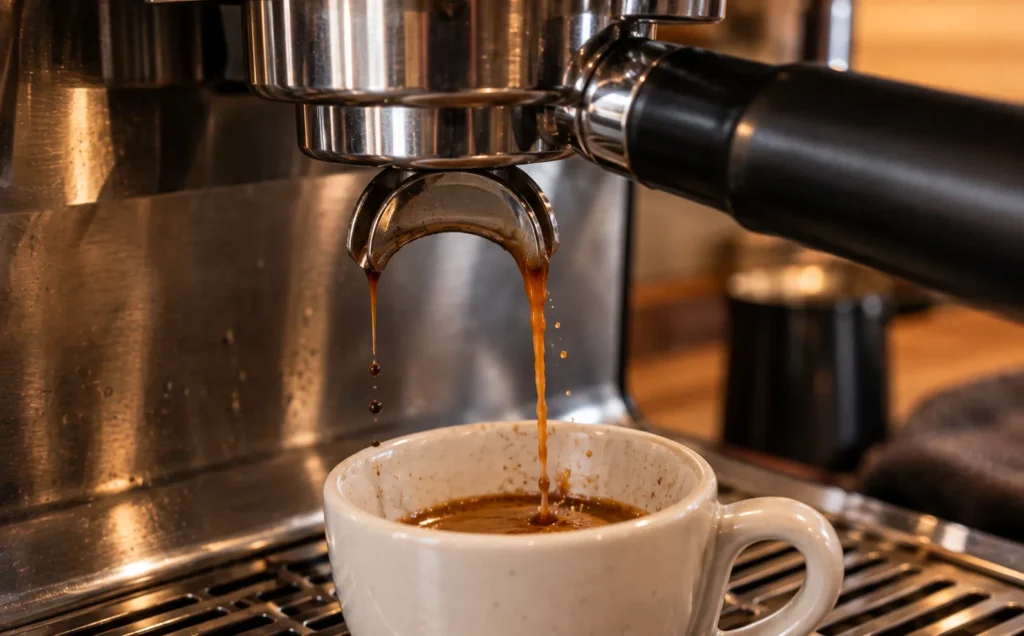
Watch for a stream that starts uneven from the first second. One thin, fast jet shooting out at an angle while the rest of the portafilter spouts stay quiet or drip. Sometimes it's a single spray that arcs sideways instead of dropping straight down. Sometimes both spouts run, but one looks like a normal steady flow, and the other sprays. A shot time much faster than usual (well under 20 seconds), combined with a thin, pale, watery-looking pour, is a strong channeling signal even before you taste it.
In the cup, a channeled shot usually tastes sour, thin, and oddly hollow. Sharp and acidic in a way that's different from a normal under-extracted shot, because water barely touched part of the puck and rushed through another part. You end up with a blend of over- and under-extracted coffee in the same cup, which is why channeled shots can taste both sour and vaguely bitter at once. It's also why they're harder to fix by just adjusting grind size the way you would a simple sour or bitter shot. A wet, soupy puck on its own is not a sign of channeling. Our guide to wet puck espresso explains why.
Why Espresso Channeling Happens
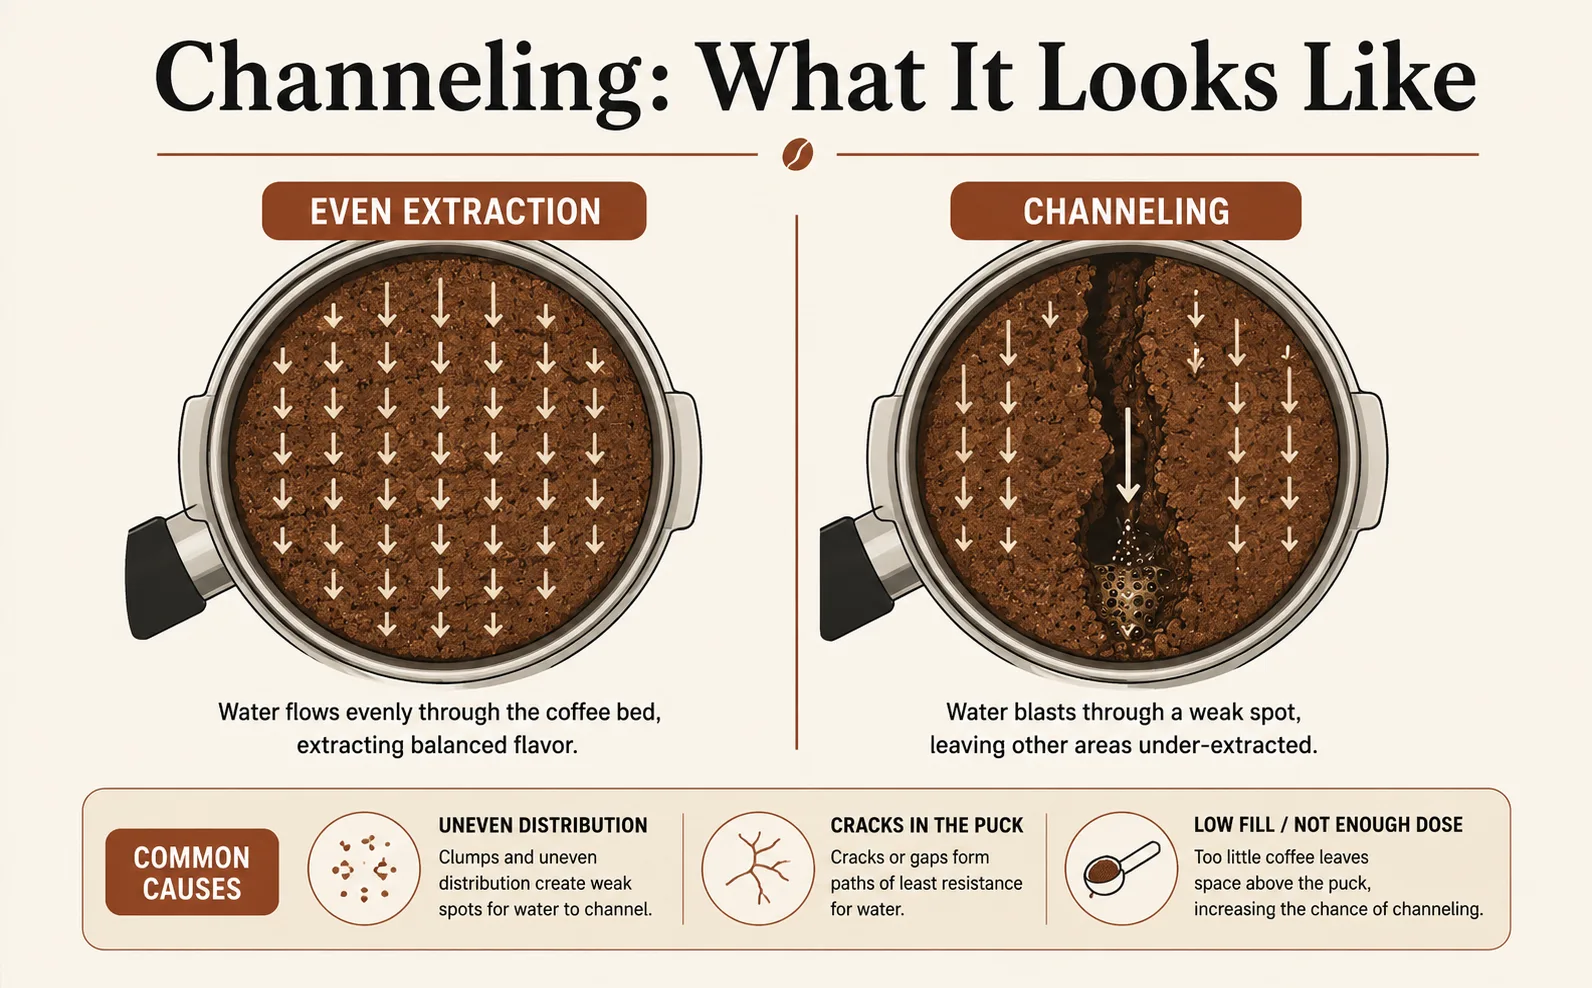
Water always takes the path of least resistance. In a well-prepared puck, that resistance is even everywhere, so water spreads through the whole bed of coffee at roughly the same rate. Espresso channeling happens when some part of the puck offers less resistance than the rest (a gap, a crack, a loose patch, or an area that's less dense than its surroundings). Water rushes through that weak point instead of pushing evenly across the whole puck. Puck screens are often sold as a fix for channeling, but the evidence for that is thin, as our puck screen guide explains.
That weak point almost always comes from how the puck was built, not from the machine. A few things create it:
Uneven distribution before the tamp. If grounds pile unevenly in the basket, clumped on one side, sparse on the other, or sitting in mounds instead of a flat, level bed, you're tamping an uneven pile into a puck that's dense in some spots and loose in others. The loose spots become channels.
A cracked or fractured puck. A puck that cracks after tamping, from being bumped, from the portafilter being locked in at an angle, or from a very fine grind that's more brittle once compressed, gives water an obvious low-resistance path straight through the crack.
A tamp that isn't level. Tamping at an angle compresses one side of the puck more than the other. The under-compressed side is looser and lets water through faster than the rest of the bed.
Loose grounds around the basket wall. Grounds that sit against the inside edge of the basket without getting compressed into the main puck create a thin channel around the perimeter. This is why a shot that channels around the edges often looks like it's leaking down the side of the portafilter rather than shooting from the spouts.
Stale or inconsistent grind particles. A grinder producing a wide range of particle sizes (fines mixed with much larger chunks) packs unevenly no matter how careful your tamp is, because the small and large particles settle differently under pressure.
The Most Common Causes
In rough order of how often each one is the culprit:
- Uneven distribution before tamping: by far the most common cause, and it's also the easiest to fix.
- A tamp that isn't level: usually from tamping without looking, or from a tamper that doesn't match the basket size.
- A cracked puck from a rough portafilter lock-in: twisting or bumping the portafilter into the group head hard enough to jar the puck.
- Loose grounds at the basket wall: often from dosing straight into the basket without settling grounds toward the center first.
- Grind consistency: a grinder with worn or lower-quality burrs producing inconsistent particle sizes, which distributes and packs unevenly no matter how well you prep.
Fixes, in the Order to Try Them
Start with distribution, not the tamp. Before you tamp, break up any clumps and level the grounds across the basket. A distribution tool (WDT) with thin needles stirred through the grounds in a zigzag motion breaks up clumps and air pockets far more reliably than tapping the portafilter on the counter. Tapping tends to just settle grounds unevenly rather than leveling them.

Tamp straight down and level every time. Watch the tamper as it goes in, not just the counter or your hand. A level base is what a level tamp depends on. Check that your tamper's diameter matches your basket size, since an undersized tamper compresses the center and leaves the outer ring loose.
Lock the portafilter in gently. Twisting hard or slamming the portafilter into the group head can crack an otherwise fine puck. A firm, smooth motion is enough. You don't need force.
Check the basket edge. After tamping, run a finger (or look closely) around the rim for loose grounds sitting against the wall that didn't get compressed into the puck. A quick edge tap with the tamper, or redistributing before you tamp, clears this.
If it's still channeling after all of that, look at the grinder. Inconsistent particle size is the one cause that technique alone can't fully fix. If shots channel randomly even with careful distribution and a level tamp, rule out worn burrs or a grinder that isn't suited to espresso-fine grinding before anything else.
Common Mistakes
Blaming the grind size first. Channeling produces symptoms (fast shot time, sour taste) that look like a grind problem, so it's tempting to just grind finer. That usually makes it worse, because a finer grind through the same uneven puck just channels faster and harder through the same weak spot.
Tapping the portafilter to "settle" the grounds. This is one of the most common habits that causes channeling. Tapping shifts grounds unevenly rather than leveling them, and often creates exactly the kind of loose pocket that channels.
Tamping harder to compensate. More tamping pressure doesn't fix uneven distribution. It just compresses an already-uneven pile more firmly, which can lock the unevenness in rather than correct it.
Ignoring the pour and only judging by taste. Watching the shot as it pulls is the fastest way to catch espresso channeling early. If you only taste the finished cup, you lose the clearest evidence.
Espresso Channeling: Putting It Together
Channeling looks like a grind problem, but it is usually a distribution problem. The fix almost always lies in how evenly the grounds get spread and compressed before water touches them. Fix the puck, and espresso channeling tends to disappear on its own, without touching the grind setting at all.
If you are not sure what you are tasting, the espresso troubleshooting guide covers sour, bitter and inconsistent shots as well.
This guide is part of the Troubleshooting hub, which brings together our guides on fixing sour, bitter and uneven shots.
What to Read Next
If espresso channeling keeps showing up even after you dial in distribution and tamping, the next place to look is your tamping and distribution technique, with a deeper look at WDT and puck prep. If you're not sure whether what you're tasting is channeling, straightforward under-extraction, or over-extraction, the taste map walks you through how to read the cup back to the cause. That distinction matters because espresso channeling looks similar to plain under-extraction at a glance.
Researchers at the University of Huddersfield modeled this in a 2023 Physics of Fluids paper: when part of the coffee bed is packed tighter, water favors the looser path, and the tighter region ends up under-extracted.
Espresso channeling is one specific cause of inconsistency. For the wider list of why shots vary pull to pull, see inconsistent espresso shots.